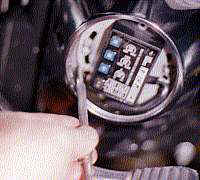
Figure 3 |
Remove outer ignition cover. Before you remove the ignition sensor
plate or ignition module, you will want retain the current ignition timing. This can be
done by scribing a mark on the sensor plate and on the inside of the nose cone as in
Figure 3. When re-assembling the engine, the original ignition timing can be
set by aligning the scribe marks made earlier.
Complete the removal of the ignition components by:
 | Remove ignition sensor or module. The sensor or module can not be
completely removed because of the wiring. Pull enough of the wiring through the
Timing Gear cover to keep the sensor out of the way. |
| Remove rotor from the end of the camshaft. |
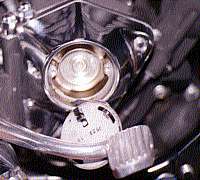
Figure 4 |
Remove the Timing Gear Cover or the "Nose Cone" as it is
sometimes referred to. Remember the locations of the bolts used to retain the Timing Gear
Cover. There are several different length bolts. It is important that they be replaced in
the proper bolt hole.
Use rubber or polyurethane hammer to gently tap the cover loose. You
may have to use a screwdriver to "gently" pry the cover off the alignment pins.
It is important that minimal force be used to remove the cover so that gasket surfaces on
the engine case and timing cover case are not damaged.
Move the Timing Gear Cover off to the side. The cover can not be
moved away from the engine because the wiring to the ignition will not allow it. The cover
can be held in place, out of the way with a bungee cord.
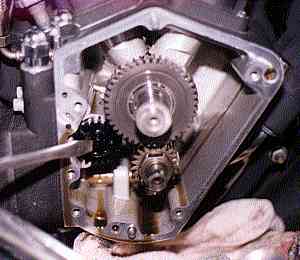
Figure 5 |
Note the location of the camshaft. Locate the timing marks on the
camshaft and the pinion gear. Align these timing marks before you remove the old cam.
With the back wheel raised off the ground, the engine can be rotated by placing the
transmission in 5th gear, then turning the rear wheel until the desired engine position is
reached
Remove the breather gear nylon washer and the breather gear from the
engine. The breather gear is the black plastic gear toward the rear of the engine.
The lifters need to be out of the way prior to removing the
camshaft. If the engine has more than 20,000 miles on it or is a 1996 or older bike, it is
recommended that the lifters be replaced. The current design Harley-Davidson OEM lifters
work find for all engine applications under 6500 RPMs.
To remove the lifters, remove the lifter blocks. Removal of the
lifter blocks requires a 1/4" 12 point socket.
If you do not have a camshaft installation tool or a magnetic lifter
holder, it is recommended that you remove the lifter blocks. This type of tool makes it
easy to hold the lifters in place while the cam is being installed.
With the lifters held in place with a camshaft installation tool or
the lifter blocks removed:
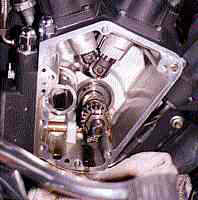
Figure 7 |
Remove the old camshaft from the engine
Remove camshaft thrust washer from the engine case if it does not
come out with the camshaft. Check for any camshaft spacers that may have been in place. If
there is currently an aftermarket camshaft in the engine, there should be a spacer. If you
have the OEM "N" grind camshaft, there is no spacer, just the thrust washer.
Your engine should now look very much like Figure 7.
|